-
Templates
1099 FormsAccurately report 1099 information returns and ensure IRS filing with easeExplore all templatesW-9 W-8 FormsEasily manage and share taxpayer details to streamline payments and meet IRS requirements with confidenceExplore all templatesOther Tax FormsFillable tax forms simplify and speed up your tax filing process and aid with recordkeeping.Explore all templatesReal EstateReal estate templates for all cases, from sale to rentals, save you a lot of time and effort.Explore all templatesLogisticsSimplify your trucking and logistics paperwork with our ready-to-use transportation and freight templates.Explore all templatesMedicalMedical forms help you keep patient documentation organized and secure.Explore all templatesBill of SaleBill of Sale templates streamline the transfer of ownership with clarity and protection.Explore all templatesContractsVarious contract templates ensure efficient and clear legal transactions.Explore all templatesEducationEducational forms and templates enhance the learning experience and student management.Explore all templates
-
Features
FeaturesAI-Enhanced Document Solutions for Contractor-Client Success and IRS ComplianceExplore all featuresAI Summarizer Check out the featureAI PDF summarizer makes your document workflow even faster. Ask AI to summarize PDF, assist you with tax forms, complete assignments, and more using just one tool.Sign PDF Check out the featurePDFLiner gives the opportunity to sign documents online, save them, send at once by email or print. Register now, upload your document and e-sign it onlineFill Out PDF Check out the featurePDFLiner provides different tools for filling in PDF forms. All you need is to register, upload the necessary document and start filling it out.Draw on a PDF Check out the featureDraw lines, circles, and other drawings on PDF using tools of PDFLiner online. Streamline your document editing process, speeding up your productivity
- Solutions
- Features
- Blog
- Support
- Pricing
- Log in
- Sign Up


Authorization to Access TIAA Accounts and Power of Attorney
Get your Authorization to Access TIAA Accounts and Power of Attorney in 3 easy steps
-
01 Fill and edit template
![Fill Authorization to Access TIAA Accounts and Power of Attorney]()
-
02 Sign it online
![Sign Authorization to Access TIAA Accounts and Power of Attorney]()
-
03 Export or print immediately
![Export Authorization to Access TIAA Accounts and Power of Attorney]()
What Is TIAA?
TIAA (Teachers Insurance and Annuity Association of America) is an American financial services organization that provides investment and insurance services. TIAA is renowned for its financial solutions tailored to meet the unique needs of education, government, and other non-profit institution employees. With its commitment to helping clients achieve financial well-being, flexibility in managing your investment is one of TIAA's policy. Hence, the TIAA authorization to access TIAA accounts.
Importance of authorization to access TIAA accounts
So why exactly would someone need authorization to access TIAA accounts? The main reason is convenience. It might be because the account owner is unable to access his/her account due to illness, age, travel, or other personal reasons.
In such situations, having someone trustworthy accessing your TIAA account on your behalf becomes invaluable. With a valid authorization to access tiaa cref accounts , you don't have to stress about your account's management and can rest assured that your financial responsibilities are being taken care of.
How to Fill Out Authorization to Access TIAA Accounts
To accurately fill out the authorization to access TIAA accounts and power of attorney form template on PDFLiner, follow these steps:
- Start by providing your personal information. Enter your first name, middle initial, and last name along with any suffixes. Provide your Social Security Number or Taxpayer Identification Number, contact telephone number, and if applicable, an extension number. Make sure to use black or dark blue ink for clarity.
- Proceed to enter your mailing address, including city, state, and zip code. Also provide your residential address, which is your legal primary address, along with the city, state, and zip code associated with it.
- Select the type of authorization you wish to grant. Choose between Option A for authorizing a firm or organization, Option B for an individual, or Option C if you intend to revoke existing authorizations only.
- For Option A, fill in the firm's name, Taxpayer Identification Number, and APIN if applicable. Include the primary firm contact's name, telephone number, extension, fax number, and email. For the mailing address, ensure you fill in the street, city, state, and zip code.
- If you choose Option B, enter the individual's name, their employing firm if applicable, and their Social Security Number or Taxpayer Identification Number. Provide their home, work, and fax numbers as well as their email and mailing address.
- Define the relationship of the authorized party to you by selecting the appropriate role such as spouse, family member, financial advisor, attorney, accountant, or a court-appointed representative. Attach the necessary documents if appointing a legal or financial representative.
- Specify the level of authorization you are granting. This can be 'Inquiry Only', 'Limited Rights Plus Inquiry', or 'Full Power of Attorney/Fiduciary Rights'. If choosing 'Full Power of Attorney', attach a TIAA Power of Attorney form.
- Indicate the duration of the authorization. If you want the authorization to have an expiration date, specify it. If no expiration date is provided, the authorization will remain in effect until you notify TIAA in writing.
- If you have a financial advisor as your primary authorized party and need to authorize additional individuals or firms, fill in their names and Tax Identification Numbers, specifying their authorization level and duration.
- Complete the signature section by signing your name and dating the document. Remember, digital signatures are not accepted.
- If applicable, fill out the Power of Attorney section, designating your attorney in fact, and providing the scope of their authorized powers. Sign and date this section in the presence of a Notary Public.
- Finally, mail the completed form to the address provided on the form, ensuring all sections are completed accurately to avoid any delays in processing.
Related Content - Authorization to Access TIAA Accounts and Power of Attorney
-
![]() Personal Financial Statement TemplateWhat is the Personal Financial Statement 1 Form? Personal Financial Statement 1 Form is a federal form of the US Government that allows revealing the current financial situation of an individual in the required period....
Personal Financial Statement TemplateWhat is the Personal Financial Statement 1 Form? Personal Financial Statement 1 Form is a federal form of the US Government that allows revealing the current financial situation of an individual in the required period.... -
![]() EFT Authorization FormWhat is an EFT Authorization Form? The EFT Authorization Form is used for establishing the Electronic Funds Transfer Form (EFT) instructions on your Fidelity account. This form contains only one page and doesn’t need any additional...
EFT Authorization FormWhat is an EFT Authorization Form? The EFT Authorization Form is used for establishing the Electronic Funds Transfer Form (EFT) instructions on your Fidelity account. This form contains only one page and doesn’t need any additional... -
![]() Statement of Funeral Goods and Services SelectedUnderstanding the Statement of Funeral Goods and Services Selected Before diving into how to get the form from PDFliner, it's essential we familiarize ourselves with what the Statement of Funeral Goods and Services Selected is....
Statement of Funeral Goods and Services SelectedUnderstanding the Statement of Funeral Goods and Services Selected Before diving into how to get the form from PDFliner, it's essential we familiarize ourselves with what the Statement of Funeral Goods and Services Selected is.... -
![]() Western Union Lost Money OrderWhat Is Western Union Money Order Lost Form? A Western Union Money Order Lost Form is the document you need to fill out if you're dealing with lost Western Union money orders. This form is...
Western Union Lost Money OrderWhat Is Western Union Money Order Lost Form? A Western Union Money Order Lost Form is the document you need to fill out if you're dealing with lost Western Union money orders. This form is... -
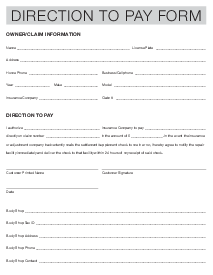
![]() Direction to Pay FormWhat Is a Direction to Pay Form Template? A Direction to Pay Form is a document utilized to instruct a financial institution or entity to make payments on behalf of the account holder. The template...
Direction to Pay FormWhat Is a Direction to Pay Form Template? A Direction to Pay Form is a document utilized to instruct a financial institution or entity to make payments on behalf of the account holder. The template...


Fillable online Authorization to Access TIAA Accounts and Power of Attorney