-
Templates
1099 FormsAccurately report 1099 information returns and ensure IRS filing with easeExplore all templatesW-9 W-8 FormsEasily manage and share taxpayer details to streamline payments and meet IRS requirements with confidenceExplore all templatesOther Tax FormsFillable tax forms simplify and speed up your tax filing process and aid with recordkeeping.Explore all templatesReal EstateReal estate templates for all cases, from sale to rentals, save you a lot of time and effort.Explore all templatesLogisticsSimplify your trucking and logistics paperwork with our ready-to-use transportation and freight templates.Explore all templatesMedicalMedical forms help you keep patient documentation organized and secure.Explore all templatesBill of SaleBill of Sale templates streamline the transfer of ownership with clarity and protection.Explore all templatesContractsVarious contract templates ensure efficient and clear legal transactions.Explore all templatesEducationEducational forms and templates enhance the learning experience and student management.Explore all templates
-
Features
FeaturesAI-Enhanced Document Solutions for Contractor-Client Success and IRS ComplianceExplore all featuresAI Summarizer Check out the featureAI PDF summarizer makes your document workflow even faster. Ask AI to summarize PDF, assist you with tax forms, complete assignments, and more using just one tool.Sign PDF Check out the featurePDFLiner gives the opportunity to sign documents online, save them, send at once by email or print. Register now, upload your document and e-sign it onlineFill Out PDF Check out the featurePDFLiner provides different tools for filling in PDF forms. All you need is to register, upload the necessary document and start filling it out.Draw on a PDF Check out the featureDraw lines, circles, and other drawings on PDF using tools of PDFLiner online. Streamline your document editing process, speeding up your productivity
- Solutions
- Features
- Blog
- Support
- Pricing
- Log in
- Sign Up


Form 520, Seller Representation Agreement
Get your Form 520, Listing Agreement, Commercial, Seller Representation Agreement in 3 easy steps
-
01 Fill and edit template
![Fill Form 520, Listing Agreement, Commercial, Seller Representation Agreement]()
-
02 Sign it online
![Sign Form 520, Listing Agreement, Commercial, Seller Representation Agreement]()
-
03 Export or print immediately
![Export Form 520, Listing Agreement, Commercial, Seller Representation Agreement]()
Delving into Seller Representation Agreement: What is the 520 Form?
The Form 520 is fondly referred to as the Seller Representation Agreement. Its structure takes after the typical legal contract, defining the relationship between a seller and their chosen sales representative or broker. The form unfurls intricate details about the property under consideration while also laying out a roadmap of terms and conditions directing the transaction. Its vital purpose is to guard the interests of both involved parties, ensuring the wheel of transactions runs smoothly and agreements stick firmly.
Importance of form 520
The operative word for the 520 form is ‘safeguard.’ This agreement safeguards the rights of all parties involved in a real estate transaction. For sellers, the agreement provides a secure space, allowing them to negotiate the terms of the sale confidently. It also promotes openness, shedding light on detailed aspects of the realtor’s commission and safeguarding sellers from unexpected twists.
This agreement outlines the basics of the services the representative will provide. It clearly defines the agreement's duration, the specific areas it covers, and the fees the representative will be paid for their services. Essentially, it is a crucial step in a property sales process as it legally holds the representative accountable for their services while guaranteeing sellers their desired results.
How to Fill Out Seller Representation Agreement
To accurately complete the seller representation agreement OREA template, follow this detailed guide:
- Begin by opening the 520 PDF document to familiarize yourself with the specific fields and sections that you will need to fill out. The form consists of information regarding the brokerage, seller, property details, and agreement terms. Identify the areas where you need to input data, such as the seller's details, brokerage information, property description, and listing period.
- Enter the name of the brokerage firm and its contact information in the designated sections. This will include the brokerage name, address, and telephone number. Ensure you input this accurately to maintain the form’s validity and avoid any legal discrepancies.
- Provide the seller's information next. This includes the name of the seller or sellers and their contact details. If there are multiple sellers, make sure to list each one and ensure that their names are spelled correctly to reflect the title records.
- Describe the property being listed for sale. This section requires a detailed description of the property, including its address, legal description, and any unique characteristics or features. Be as precise and thorough as possible to ensure that the listing is accurate and comprehensive.
- Specify the listing period. This is the timeframe during which the brokerage has the exclusive right to sell the property. Fill in the start and end dates of the listing period, adhering to any agreed terms between the seller and the brokerage. If the period extends beyond six months, remember to obtain the seller's initials as required by the Real Estate and Business Brokers Act, 2002.
- Set the price at which the property is to be offered for sale. Include any terms related to the sale price that were agreed upon between the seller and the brokerage. This may include conditions or flexibilities regarding the final sale price.
- Add any additional terms and conditions relevant to the listing agreement. This might include obligations and expectations for both the seller and the brokerage, such as marketing rights, open house arrangements, and commission structures. Ensure all financial terms, including the commission rate and any potential bonuses or penalties, are clearly noted.
- Ensure that all necessary parties sign and initial the document where required. This includes places for the seller’s initials next to key sections and the signature fields at the end of the document. Double-check that all initials and signatures are placed correctly to validate the agreement. Also, you may use send-to-sign function if you need it.
- Review the entire document to ensure all information is accurate and complete. Pay particular attention to the legal terms and conditions to ensure that they are fully understood and properly represented in the agreement.
- Once the form is fully completed, PDFliner allows you to save, print, or share the document directly from the platform if you need to send it electronically to other parties for review or further action.
Role of PDFliner in simplifying property transactions
PDFliner offers a streamlined platform to get hold of Form 520 along with an array of other vital real estate papers. With the simple-to-access Listing Agreement at their fingertips, sellers can start their property sale endeavour right from the comfy confines of their homes.
Adequate understanding, a careful approach, and the right platform like PDFliner can turn commercial property transactions into a smooth and predictable process. Hence, Form 520 shouldn't be seen just as another document. Instead, it serves as a key tool that ensures the journey of selling a commercial property goes off without a hitch.
Related Content - Form 520, Listing Agreement, Commercial, Seller Representation Agreement
-
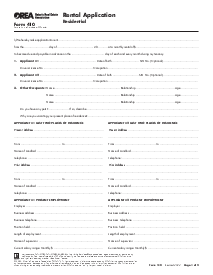
![]() Ontario Rental Application Form 410What Is Ontario Form 410 Landlords in Ontario often use OREA renter application 410 to screen tenants. It helps them gather all the necessary information about applicants to make an informed decision on whether to...
Ontario Rental Application Form 410What Is Ontario Form 410 Landlords in Ontario often use OREA renter application 410 to screen tenants. It helps them gather all the necessary information about applicants to make an informed decision on whether to... -
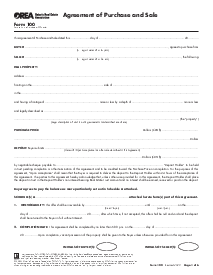
![]() OREA Form 100 Agreement of Purchase and SaleWhat Is OREA Form 100 2026? OREA Form 100 is an agreement of the purchase and sale between two parties in the Province of Ontario. The form was created to reveal the intention of the...
OREA Form 100 Agreement of Purchase and SaleWhat Is OREA Form 100 2026? OREA Form 100 is an agreement of the purchase and sale between two parties in the Province of Ontario. The form was created to reveal the intention of the... -
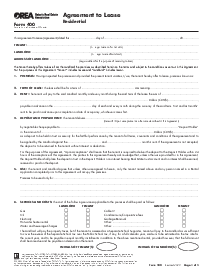
![]() OREA Form 400 Agreement to Lease ResidentialWhat Is Fillable OREA Form 400? An OREA Form 400 fillable PDF is an official document based on which a landlord and tenant agree on the lease of premises, fix a rent and advance payment,...
OREA Form 400 Agreement to Lease ResidentialWhat Is Fillable OREA Form 400? An OREA Form 400 fillable PDF is an official document based on which a landlord and tenant agree on the lease of premises, fix a rent and advance payment,... -
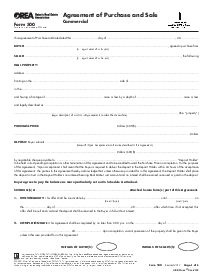
![]() OREA Form 500What Is OREA Form 500? OREA commercial agreement of purchase and sale or OREA 500 form was created by the Ontario Real Estate Association to clarify and simplify relations between buyer and seller. This is...
OREA Form 500What Is OREA Form 500? OREA commercial agreement of purchase and sale or OREA 500 form was created by the Ontario Real Estate Association to clarify and simplify relations between buyer and seller. This is... -
![]() Agreement to LeaseWhat Is OREA Form 511 Also referred to as Commercial Agreement to Lease, OREA Form 511 is a legal document utilized in Ontario, Canada, in commercial real estate transactions. This doc serves as an agreement...
Agreement to LeaseWhat Is OREA Form 511 Also referred to as Commercial Agreement to Lease, OREA Form 511 is a legal document utilized in Ontario, Canada, in commercial real estate transactions. This doc serves as an agreement...


Fillable online Form 520, Listing Agreement, Commercial, Seller Representation Agreement